Archilochus, a Greek poet and soldier from the 7th century BCE, once wrote, “We don’t rise to the level of our expectations, we fall to the level of our training.” The U.S. Army knows this all too well, which is why they have developed 14 battle drills that they expect all soldiers to know, from the youngest private to the most senior leaders at the Pentagon.
Since its establishment in 1775, the Army has developed warfare curriculum and tactics, repeatable processes that soldiers can default to in the most harrowing situations. These drills have been used to fight on horseback, in tanks, and even a soldier’s own two feet. According to ATP 3-21.8 (which supersedes the older FM 7-8), the Army defines a battle drill as “standardized collective actions made in response to common battle occurrences. They are designed for rapid reaction situations without the application of a deliberate decision-making process.”
In other words, the Army’s modern battle drills enable soldiers to develop lightning-fast reactions suitable for almost any situation in combat. A properly executed battle drill may mean the difference between battlefield victories and saved lives, so we broke down each of them at the most basic level. Consider this additional reading to better prepare you for understanding your job as a soldier, however, this isn’t a comprehensive class on battle drills and we don’t recommend telling your team leader they’re wrong because you read something on the internet.

82nd Airborne Division, 2nd Brigade Combat Team, Team Live Fire
Battle Drill 1: React to direct fire contact
This is the most important battle drill because it’s the one that trains you to survive initial contact. Should the enemy start laying down the scunion, Battle Drill 1 says to immediately shoot back while getting behind cover that will protect and conceal you, or if none is available and you’re out in the open, then drop into the prone. If you’re in a vehicle, get out.
Soldiers, usually the team leader first (but not always), should call out, at a minimum, the direction, distance, and description – otherwise known as the 3Ds.
At the most basic level, this might sound like “12 o’clock! 200 meters! Enemy in the open!” Direction is the most important piece of information, for what should be obvious reasons.
Vehicles should move out of the “beaten zone” with the same intention of obtaining concealment and protective cover. Soldiers dismount to provide additional fire support, while others man the main guns of the vehicle to engage the enemy. Leaders and their subordinate soldiers maintain a line of sight with the troops and vehicles on their left and right, ensuring accountability in the heat of the battle.
Subscribe to Task & Purpose today. Get the latest military news and culture in your inbox daily.
Further decisions are made pending the battle unfolding before the troops. Whether you’re the squad leader or the team leader, the various levels of leadership pass up information to the unit commander on what they are seeing and what they are doing about it.
Leaders are following up with those below them in the command to see what the troops in contact need, whether that’s checking for fuel levels, the aircraft providing close air support, or checking the physical status of the soldiers up front in direct contact with the enemy force.
The react-to-contact drill then, typically, will flow directly into a squad or platoon attack.
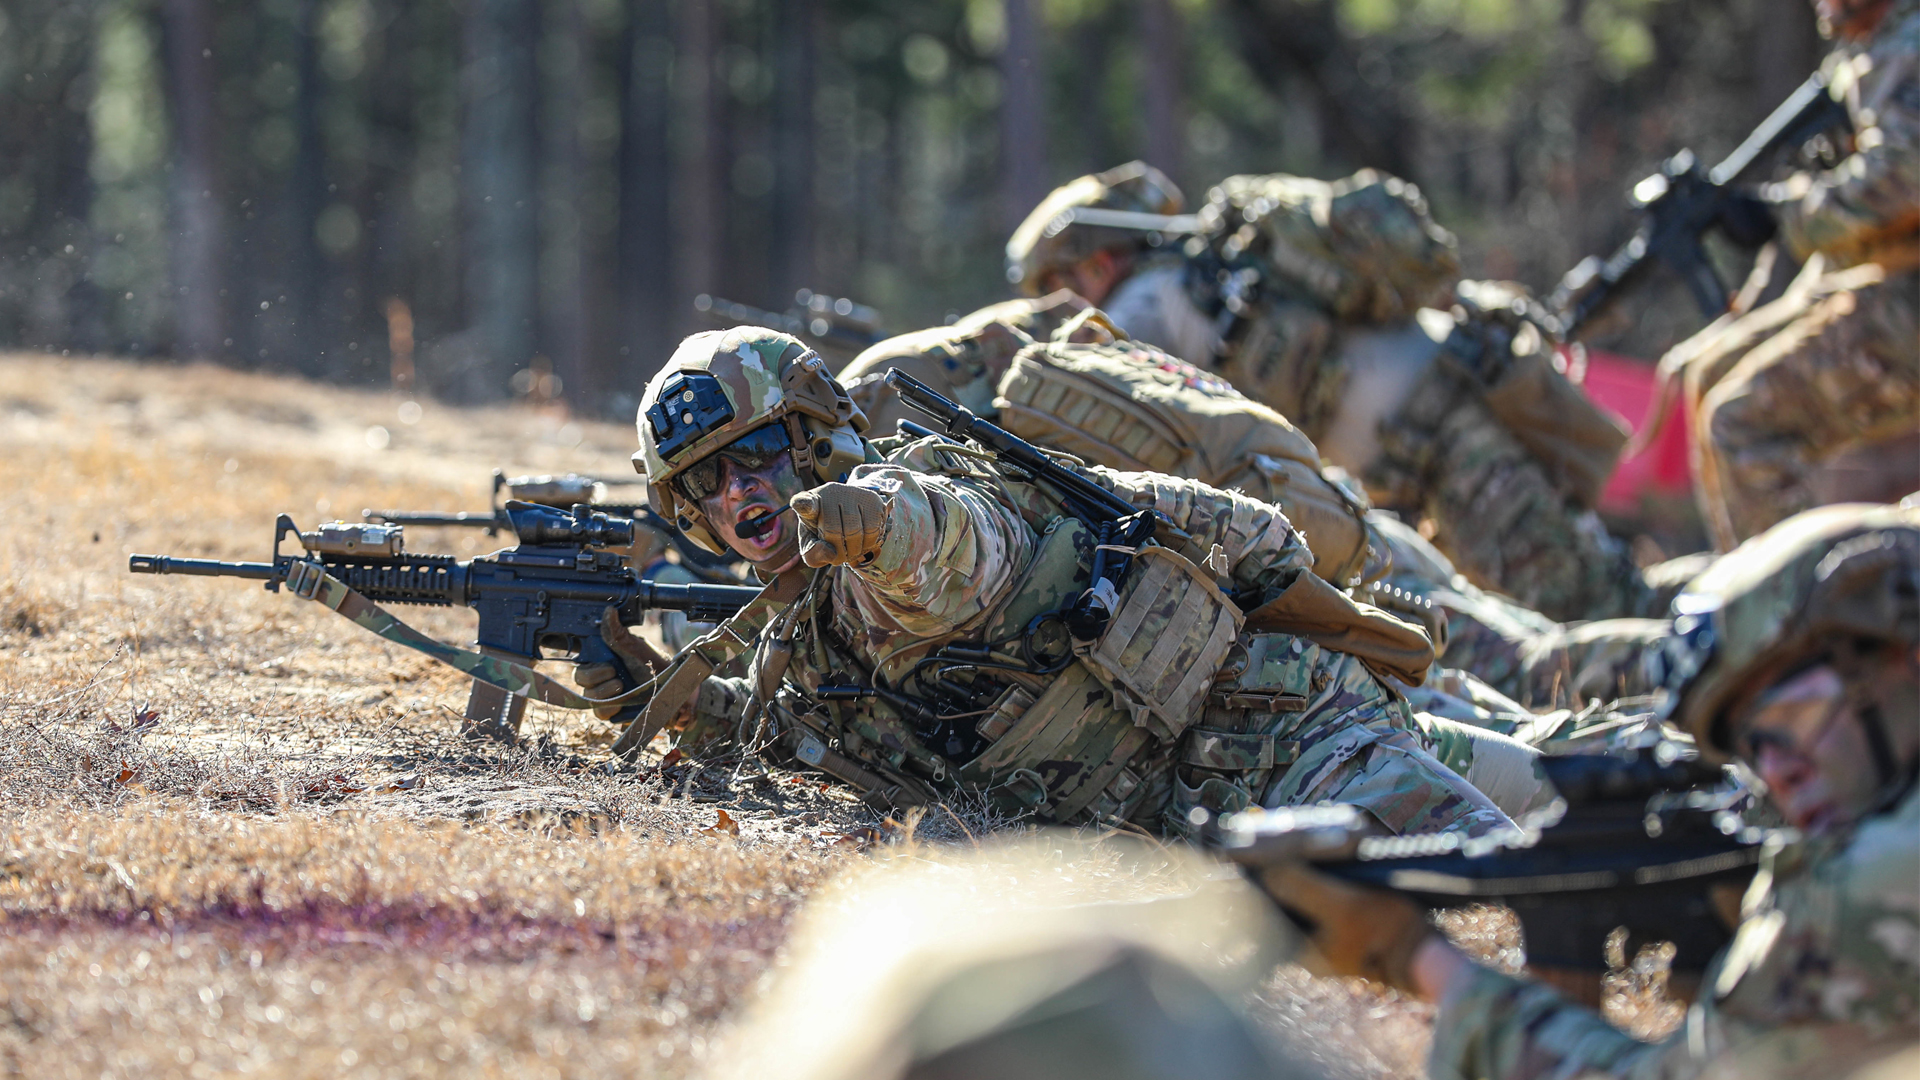
Battle Drill 2: Conduct a platoon assault
“I’m up, he sees me, I’m down!” Battle drill 2 is the bread and butter of assaulting an objective at a squad or platoon level.
As the title indicates, this battle drill is at the platoon level. The platoon’s lead squad will move up and initiate contact with the enemy while laying down suppressive fire so the rest of the platoon can move up, assist, or help assault forward.
The platoon leader moves up with the forward observer, RTO, and second squad leader, while a machine gun team moves to the squad that initiated suppressive fires. The platoon leader can call up more squads if they cannot gain superiority over the enemy. The platoon sergeant moves and directs the vehicles attached to the platoon, moving and coordinating fires as needed.
Once soldiers establish suppressive fire, the other squads move into a flanking position under cover. As the assaulting squads approach, the base of fire shifts to the other flank, and the assaulting force picks up suppressive fires as they move in on the target. The platoon’s forward observer will call indirect fires to keep the enemy within the assault area.
Once the target is seized and all initial objectives are met, the platoon leader will rally the vehicles and base-of-fire personnel on target. Then soldiers are assigned new defensive positions, sectors of fire, pre-designated targets for the FO to call in ordinance on, and soldiers at observation points to warn of a counter-attack. The platoon leader will pick replacements if any critical positions within the platoon or squad are vacant due to injury or death.
Battle drill 2A: Conducting a squad assault is almost identical to the platoon assault approach, just at a squad level. At the squad level, gear is redistributed to key soldiers as needed. Once the assault concludes, situation reports (SITREP) are sent to the headquarters element of the unit.

Platoon Attack • Live-Fire Exercise U.S. Army
Battle Drill 3: Break contact
As the great sensei Rex Kwon Do famously said: “Break the wrist, walk away.” But breaking contact with an enemy can be dicey. Battle drill 3 is sometimes the last resort or a key part of an overall tactical plan, like harassing the enemy.
Soldiers initiate breaking contact by throwing smoke, concussion, and fragmentation grenades to allow squads to retreat from the area. As squads retreat, others provide covering support.
The terrain can dictate what routes of egress are available, and sometimes the only way out is the way you came – that is almost always a last resort though.
Breaking contact is finalized when the main element is clear of the area or falls back to a superior firebase they can rally with to repel the enemy (if needed). Head counts are completed, gear is accounted for, and a SITREP is reported up the chain of command. Battle drill three is vital to train on, as it can be the difference between life and death.
Battle Drill 4: React to ambush
Have you ever seen the movie, “Predator?” Then you know what a near ambush is, but instead of getting blown in half by an alien hunter, it’s human bad guys with guns and explosives.
According to the Army, a near ambush is defined by an enemy firing on your element within hand grenade range. That’s never a fun situation, and the solution isn’t much better, either.
Battle Drill 4 instructs soldiers to assault through the ambush while firing accurate suppressing fire to get out of the kill zone. But, if you are in armored or soft-sided vehicles, you have the same objective: fight through the enemy to get out of the kill zone.
Platoon leaders can instruct their forward observer to call in close air support to help the element break through the ambush. The key is overwhelming the enemy with fire that keeps their heads down until it’s too late. Once through the ambush, a report is sent up to the headquarters element.
Battle Drill 5: Knock out a bunker
Many who joined the Army watched World War II movies like “Saving Private Ryan” or, more recently, “Fury” and felt motivated to serve their country. One of the most prevalent scenes in that genre of movies is knocking out a bunker.
That’s Battle drill 5 for the Army, and like many movies depicted, American G.I.s were knocking out Nazi bunkers in 1944 like it was going out of style. But it’s still trained today, and even though there weren’t a lot of conventional bunkers in Afghanistan, there were cave systems that this battle drill was helpful with.

U.S. Army Soldiers conduct Battle Drill Five, Knock Out a Bunker (Oct 2023)
Take what you know about battle drill one and apply it here. If an Army element runs into a bunker system, the unit leader establishes a base-of-fire for suppressing fires. Smoke grenades can provide concealment for adjusting positions or advancing on the bunker. The unit leader or FO may call in an indirect hit to take out the bunker as appropriate.
When approaching the bunker, find an open flank to the most dangerous bunker. But keep your eyes open for any other bunkers that can ambush you. Squads push up via leapfrog and maintain shifting fires on the bunker to keep the bad guys’ heads down.
Once a team is closing in on the bunker, supporting teams shift their fires to allow a grenadier to approach the bunker, ‘cooking’ a grenade up to a maximum of two seconds before yelling “frag out” while throwing it into the bunker. Once the grenade detonates, teams will move up to the entrance to clear the bunker.
After the threat is eliminated, the bunker is marked as cleared according to the unit’s standard operating procedures (SOP), and a SITREP is sent up to higher headquarters. If there are follow-on bunkers, the unit will rally and knock out equipment checks, redistribution, and confirm plans to attack the next bunker.
Battle Drill 6: Enter and clear a room
You’ve likely seen the recruiting commercials or the high-speed scenes in the latest action movie showing a tactical team entering a room and eliminating all threats. Battle Drill 6: Enter and clear a room is the doctrine guiding the essential skill for close quarters combat.
Though all soldiers are trained on it, and the infantry practices it regularly, Battle Drill 6 is the bread and butter of the U.S. military’s special operations forces.
This battle drill isn’t Hollywood, where Jason Bourne clears an entire military complex solo. This battle drill requires four soldiers to carry out. Two-man “buddy” teams can clear a room, but that’s not covered under the battle drill. Neither is breaching, which is a complex topic involving mechanical, explosive, and ballistic methods outside of the scope of this story.

Legendary US Army Green Berets Special Forces CQB Capabilities Demonstration
We’ll keep this as simple as possible: The point man enters the room, usually button hooking to the left or right, taking the path of least resistance, scanning sectors until they reach the corner and establish a point of domination. The second soldier enters almost simultaneously but moves in the opposite direction of the point man. Soldiers three and four will follow suit.
If there are more rooms, the unit leader will rally everyone, take accountability checks on soldiers and equipment, and decide whether they have the manpower to push forward. Remember that battle drill six doesn’t break down how to clear a staircase, long corridor, or other complicating factors with clearing a building. This battle drill can increase in complexity based on the mission and the skill level of the soldiers executing it.
Battle Drill 7: Enter a trench to secure a foothold
Trench warfare showed its ugly face on a major scale in WWI for the first time. Mustard gas and bloody fighting in the mud were common across the sprawling Western Front. But more recently, that same brand of trench warfare has erupted throughout Ukraine as they fight invading Russian forces.
Though technology has changed trench warfare, the tactics to take a trench from enemy forces remain similar and fall under Battle Drill 7: Enter a trench to secure a foothold. Approaching the enemy-held trench is covered under battle drills 1, 2, and 5.
Once soldiers reach the trench’s entry point, soldiers should cook off grenades for no more than two seconds and toss them into the trench. Then, two soldiers will enter the trench following the grenades detonating almost simultaneously and moving down opposite sides of the trench while killing any enemy in sight.
After eliminating the threat, the soldiers will mark the entry point as cleared, so more teams can be safely brought in. The unit leaders will rally the soldiers and equipment before deciding to clear further into the trench system or hold a blocking position for the time being.
Battle Drill 8: Conduct the initial breach of a mined wire obstacle
Mined wire obstacles are military jargon for an obstacle that has mines along one side — typically fences with or without barbed wire and concertina wire. Battle Drill 8 is the Army’s approach to breaching that obstacle and securing the other side.
If it’s manned, the first squad to come into contact will conduct a react to contact battle drill and respond with suppressing fires. The goal is to gain fire superiority over the enemy positions on the opposing side of the wire.
Smoke grenades are deployed to get the breaching fire team up to the mines and wire where they will attempt to break through, otherwise called the breach point. The base-of-fire and any indirect fires from the forward observer will shift away from the breach point as the fire team approaches.
That breaching fire team will probe the area for mines as they approach the obstacle, marking them for incoming forces to avoid. Battle Drill 8 calls for the deployment of Bangalore torpedos if available.

Saving Private Ryan – Bangalores
But if you don’t have any boom boom sticks, two soldiers will cover a third while they cut the wire. Once it’s cut, the breaching fire team leader and another soldier (automatic rifleman) move through the breach and confirm when it’s secured for the rest of the breaching fire team to move through along with the rest of the squads.
Battle Drill 9: React to Indirect Fire
If you hear your fellow soldier shout, “incoming,” you better hit the ground or dive behind the closest cover you can find. Battle Drill 9 breaks down what will become muscle memory. Unless you’re fighting where early warning systems for artillery and mortars don’t exist, you will hear that same “incoming” warning over the loudspeakers on your base. Either way, heed the warning.
This battle drill prescribes that vehicles are rapidly moved away from the point of impact. If it’s a massive bombardment that separates soldiers, meet up at the pre-designated rally point once safe to move. Anyone manning the turrets should get inside the armored vehicle immediately if they hear the incoming warning.
Otherwise, it’s hunker down until you hear the all-clear. If you are currently deployed, please make sure you know what your unit or base standard operating procedures are in case of enemy indirect fire.
Battle Drill 10: React to a Chemical Attack
This scenario is one of the more terrifying things soldiers can face. Chemical warfare is no joke, and there’s a reason it’s banned in war. Battle Drill 10 is used anytime a soldier signals in any way that there is a chemical attack or alarms are activated.
Soldiers have nine seconds to don their protective mask or 15 seconds to don their hooded protective mask. Soldiers need to use the skin decontamination kit (if necessary) before they don the rest of their MOPP 4 gear within 8 minutes of the chemical warfare alarm. Self-rescue first, then assist your fellow soldiers — you can’t help anyone if you’re dead.
The Army previously conducted a study on how chemical warfare, the gear a soldier wears, and the overall conditions can affect the soldier’s physical body and mental health. The study found that soldiers can adapt to the conditions and overexposure to the conditions. Be prepared by training this drill so that soldiers know what they are going to experience while wearing the hot and claustrophobic gear.
Battle Drill 11: React to an IED
Improvised Explosive Devices, or IEDs, became an everyday threat during the war in Iraq. Explosive ordinance disposal (EOD) technicians had to adapt, study, and establish ways to combat the ever-growing threat of IEDs. Battle Drill 11 is the Army’s answer to that threat.
This battle drill starts when a soldier identifies something that could indicate an IED, whether it’s rubble weirdly placed on the road or a wire leading away from the roadway. The soldier that spots it will update the element leader with distance, direction, and description of the potential IED. Don’t move closer to get a better look.
The element leaders can use a robot, Buffalo, optics, or other means to identify the threat. Once done, an EOD 9 Line is called up to the headquarters element. While maintaining a minimum safe distance of 300 meters, the element (or platoon) will clear the area while being mindful of snipers or secondary IEDs.
When the IED is confirmed, a minimum safe distance of at least 300 meters is established, along with a security cordon that keeps foot and vehicle traffic away from the IED. This protects civilians, denies any enemy fighters from triggering the IED as soldiers approach it, and prevents any close-up attacks on American soldiers if enemy fighters are positioned nearby.
Once a security cordon is established, only a few soldiers should carry out a varied secondary check to ensure there are no other IEDs in the area. The first check out to five meters happens from the vehicles. Check for disturbed earth, suspicious items, loose bricks in walls, and other items that are out of place.
Search from the ground up. If nothing is found, at least one but no more than a necessary number of shoulders exit their vehicle and search out to 25 meters. This can be done with optics and other detection technology before physically moving further out. The same is done for the 200-meter check. The whole time you are searching, keep an eye out for a triggerman, cameraman, or sniper.
Battle Drill 12 & 13: Dismount (or mount) a BFV and ICV
Mounting or dismounting a Bradley Fighting Vehicle (BFV) or an Infantry Carrier Vehicle (ICV) is about as simple as it sounds, with a couple of extra steps. Battle Drill 12 covers the process of dismounting BFVs and ICVs, while Battle Drill 13 breaks down the process of mounting BFVs and ICVs.
Starting with Battle Drill 12, the infantry platoon takes cover to protect the dismounting squads. The platoon leader gives the command, “dismount,” and each fire team exits in a predetermined order. Exiting should take no longer than 30 seconds using the ramp, or 45 seconds if using the combat door.
The same procedure is followed for the ICV, but there is a specified order of exit:
- First: Soldiers sitting in seats 10 and 11
- Second: soldiers in seats 8 and 9
- Third: soldiers in seats 6 and 7
- Fourth: Soldiers sitting in 4 and 5
- Fifth: the last soldier sitting in seat 3.
Once out of the ICV or BFV, the PL and platoon sergeant will carry on with the mission as planned. But, should there be a follow-on mission, Battle Drill 13 is ready to rock. It’s a simple process. One team or squad covers the other if needed, or there is a pre-designated order established by your leadership.
Once everyone is inside the vehicle, the senior leader takes a head count of all soldiers and their equipment. Once done, the senior leader will notify the vehicle commander, “all up.” Then the door or ramp is sealed and it’s off to the next mission, or if you’re lucky, a trip back to base in time for the next meal to avoid an impromptu MRE.
Battle Drill 14: Execute action right or left while mounted
The Army explains the standards for Battle Drill 14 as, “The mounted platoon changes direction into a line formation, orienting weapons on the enemy force.” In normal terms, that means a platoon moves one way or another and it starts with the PL’s signal to move via right or left arm motion or other means of communication.
The driver follows the command. They will consider cover or concealment while moving right or left with their vehicle weapons trained in the enemy’s direction, ready to engage. The PL will make the call for the troops to dismount or not. If needed, Battle Drill 12 will be executed.
For all battle drills, soldiers need to understand their roles thoroughly. Even though bunkers and chemical attacks don’t happen as often as reacting to indirect fire or clearing a room, knowing them thoroughly may save you and your fellow soldiers’ lives.
The latest on Task & Purpose
- What is the oldest military equipment still in use today?
- Arkansas Air Guard wing commander resigns over abortion policy, Governor says
- Marine Security Guard dies in Republic of the Congo
- How the military celebrates the New Year, according to combat veterans
- The history of Thompson “Tommy” guns at war